Multimedia Programming (CST 205)
Course Description
Course CST 205 examines multimedia manipulation with Python and Jython. It introduces the design, creation, and manipulation of interactive applications and electronic media for communication purpose. It focuses on creating media, understanding media concepts, and manipulating the created media using basic programming concepts of control flow, functions, expressions and data types in the Python language.
Final Project
This final project leveraged USGS data to visualize earthquake activity rendered over Google Maps images for several geographic locations. Historic earthquake data was scraped from the USGS website using Python and Beautiful Soup.
Course Projects
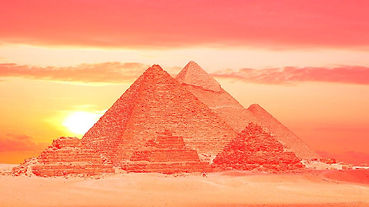
Rose-Colored Glasses
This manipulation intends to create a pink filter to emulate looking through rose-colored glasses. This is accomplished by increasing the red colors to its maximum value and slightly increasing both the blue and green values, bringing all values closer to pink (255, 192,203) :
def roseColoredGlasses():
pic = get_pic()
pixels = getPixels(pic)
for p in pixels:
r = getRed(p)
# increase red by 50%
setRed(p, 255
g = getGreen(p)
# increase green by 10%
setGreen(p, g * 1.1)
b = getBlue(p)
# decrease blue by 20%
setBlue(p, b * 1.2)
writePictureTo(pic, newImage)
return pic
This function iterates through each pixel of the image and reads the existing RGB values. A new value is set for the maximum value of red at 255, green is increased slightly by 10% and blue is increased by 20%. The new pixel value is then saved to the image.
Negative Image
This manipulation creates a negative image of the picture. This is accomplished by adjusting the RGB values in relation to the maximum value of 255.
def makeNegative():
pic = get_pic()
pixels = getPixels(pic)
for p in pixels:
r = getRed(p)
setRed(p, 255 - r)
g = getGreen(p)
setGreen(p, 255 - g)
b = getBlue(p)
setBlue(p, 255 - b)
writePictureTo(pic, newImage)
return pic
This function iterates through each pixel of the image and reads the existing RGB values. A new value is set by subtracting the value from 255, which is the maximum value possible. The new pixel value is then saved to the image, and the image is saved to file.

Better Black & White
This manipulation creates a black and white image from a color image. This is accomplished by adjusted each RGB value to a grayscale value using
def betterBnW():
pic = get_pic()
pixels = getPixels(pic)
for p in pixels:
r = getRed(p)
g = getGreen(p)
b = getBlue(p)
# set luminance with formula
lum = (r * 0.299) + (g * 0.587) + (b * 0.114)
setRed(p, lum) # set all rgb values to lum
setGreen(p, lum)
setBlue(p, lum)
writePictureTo(pic,newImage)
This function iterates through each pixel of the image and reads the existing RGB values. A new value is set based on the luminance formula (r * 0.299) + (g * 0.587) + (b * 0.114). The new pixel value is then saved to the image.


Mirror Image
This manipulation creates a variety of mirror images using similar techniques. This is accomplished by reading pixel colors and writing them on opposite sides of the image.
This function copies from Right to Left:
def R2LMirror():
pic = getPic()
pixels = getPixels(pic)
width = getWidth(pic)
height = getHeight(pic)
newPic =makeEmptyPicture(width,height)
# treat as if even-sized image
if (height % 2 == 1):
height=height-1
if (width % 2 ==1):
width=width-1
#Right to Left Mirror by Copying
for x in range(width/2, width):
for y in range(0, height):
color=getColor(getPixel(pic, x, y))
setColor(getPixel(newPic, x, y), color)
setColor(getPixel(newPic,width-x-1, y), color)
writePictureTo(newPic,newImage)
return newPic
This function copies from Bottom to Top:
def B2TMirror():
pic = getPic()
pixels = getPixels(pic)
width=getWidth(pic)
height=getHeight(pic)
newPic=makeEmptyPicture(width,height)
# treat as if even-sized image
if (height % 2 == 1):
height=height-1
if (width % 2 ==1):
width=width-1
#Bottom to Top Mirror by Copying
for y in range(height/2, height):
for x in range(0, width):
color=getColor(getPixel(pic, x, y))
setColor(getPixel(newPic, x, y), color)
setColor(getPixel(newPic,x,height-y-1), color)
writePictureTo(newPic,newImage)
return newPic
This function combines both functions for a "quad mirror" effec
def QuadMirror():
pic = getPic()
pixels = getPixels(pic)
width=getWidth(pic)
height=getHeight(pic)
newPic=makeEmptyPicture(width,height)
# treat as if even
if (height % 2 == 1):
height=height-1
if (width % 2 ==1):
width=width-1
#Quad Mirror by copying left to right...
for x in range(0, width/2):
for y in range(0, height/2):
color=getColor(getPixel(pic, x, y))
setColor(getPixel(newPic, x, y), color)
setColor(getPixel(newPic,width-x-1, y), color)
#...then top to bottom
for x in range(0, width/2):
for y in range(0, height/2):
color=getColor(getPixel(pic, x, y))
setColor(getPixel(newPic, x, height-y-1), color)
setColor(getPixel(newPic,width-x-1, height-y-1), color)
writePictureTo(newPic,newImage)
return newPic


Shrink Image
This manipulation simply reduces the size of the image. This is accomplished by copying every other pixel:
def shrink():
pic = getPic()
pixels = getPixels(pic)
width = getWidth(pic)
height = getHeight(pic)
# treat as if even-sized image
if (height % 2 == 1):
height=height-1
if (width % 2 ==1):
width=width-1
#make new pic half size
newPic = makeEmptyPicture(width/2,height/2)
#Copy image to new picture every other pixel
for x in range(2, width, 2):
for y in range(2, height, 2):
color=getColor(getPixel(pic, x, y))
setColor(getPixel(newPic, x/2, y/2), color)
show(pic)
show(newPic)
writePictureTo(newPic,r"d:\data\Shrink.jpg")
return newPic
This function iterates through every other pixel of the image and copies the existing pixel value to a new image with half the size of the original.


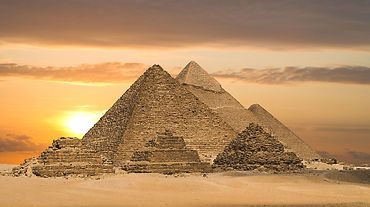
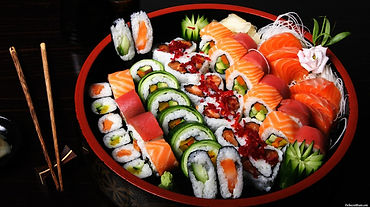
Image Collage
This manipulation creates a collage of images. This is accomplished by reading the contents of a folder and iteratively copying the images into a larger palette image to a randomized location. When the image is copied, it is randomly modified.
def makeCollage(source, target):
#create target picture (must be larger than largest image)
newWidth = 1056 # 8" x
newHeight = 816 # 11" @ 96dpi
newPic = makeEmptyPicture(newWidth,newHeight)
#save target picture to create file
writePictureTo(newPic,target)
#get photos from directory
picArray = []
picArray = os.listdir(source)
for x in range(0,12):
for item in picArray:
thisPic = source + "\\" + item
pic=getPic(thisPic)
print thisPic
height = getHeight(pic)
width = getWidth(pic)
#calculate copy location for random sized images
if width > height:
targetX = random.randint(0,newWidth - width)
targetY = random.randint(0,newHeight - width)
else:
targetX = random.randint(0,newWidth - height)
targetY = random.randint(0,newHeight - height)
#call picCopy
picCopy(thisPic,target,targetX,targetY)
def picCopy(source,target,targetX,targetY):
#process source picture
pic = getPic(source)
pixels = getPixels(pic)
width = getWidth(pic)
height = getHeight(pic)
#open target
newPic = getPic(target)
#chose copy method
select = random.randint(1,11) # generate random number
if select == 1:
#rotate left
for x in range(0, width):
for y in range(0, height):
color=getColor(getPixel(pic, x, y))
setColor(getPixel(newPic,y+targetX,width-x-1+targetY), color)
elif select == 2:
#rotate right
for x in range(0, width):
for y in range(0, height):
color=getColor(getPixel(pic, x, y))
setColor(getPixel(newPic,height-y-1+targetX, x+targetY), color)
elif select == 3:
#copy to black and white
for x in range(0, width):
for y in range(0, height):
p = getPixel(pic, x, y)
r = getRed(p)
b = getBlue(p)
g = getGreen(p)
average = r * 0.299 + g * 0.587 + b * 0.114
newColor = makeColor(average)
setColor(getPixel(newPic, x+targetX, y+targetY), newColor)
elif select == 4:
#copy and make more blue
for x in range(0, width):
for y in range(0, height):
p = getPixel(pic, x, y)
r = getRed(p)
g = getGreen(p)
b = getBlue(p)
newColor = makeColor(r,g,255)
setColor(getPixel(newPic, x+targetX, y+targetY), newColor)
elif select == 5:
#copy and convert to roseColoredGlasses
for x in range(0, width):
for y in range(0, height):
p = getPixel(pic, x, y)
r = getRed(p)
g = getGreen(p)
b = getBlue(p)
newColor = makeColor(255,g*1.1,b*1.2)
setColor(getPixel(newPic, x+targetX, y+targetY), newColor)
else:
#copy normal
for x in range(0, width):
for y in range(0, height):
color=getColor(getPixel(pic, x, y))
setColor(getPixel(newPic, x+targetX, y+targetY), color)
#save target
writePictureTo(newPic,target)

This collage was created using 480 images: 40 images imported 12 times each. Each iteration randomly generated a number to determine which modification of the image would be applied:
-
Rotate Left
-
Rotate Right
-
Rose-Colored Glasses
-
Blue filter
-
Convert to Black and White
-
No Modification
However, I used a method where only half of the randomized numbers resulted in a modification, so this allowed the images natural color to enhance the collage.
I created a video that explains how the collage was made:
Color "Artify"
This manipulation adjusts the pixel color based on the range of values to create a gradation of tone :
def artify():
border = 10
pic = get_pic()
pixels = getPixels(pic)
width = getWidth(pic)
height = getHeight(pic)
#create palette twice and wide and twice as high as
#picture, with room for borders
newPic = makeEmptyPicture(width*2+(border*3),height*2+(border*3))
#position 1
for x in range(0, width):
for y in range(0, height):
p = getPixel(pic, x, y)
r = getRed(p)
g = getGreen(p)
b = getBlue(p)
#set red image
r = int( posterize(r))
g = int( posterize(g))
b = int( posterize(b))
newColor = makeColor(r,g,b)
setColor(getPixel(newPic, border + x, border + y), newColor)
#position 2
for x in range(0, width):
for y in range(0, height):
p = getPixel(pic, x, y)
r = getRed(p)
g = getGreen(p)
b = getBlue(p)
# posterize, then adjust red higher and reverse blue
r = int( posterize(r) +32)
g = int( posterize(g))
b = int( 255 - posterize(b))
newColor = makeColor(r,g,b)
setColor(getPixel(newPic, (border*2) + width + x, border + y), newColor)
#position 3
for x in range(0, width):
for y in range(0, height):
p = getPixel(pic, x, y)
r = getRed(p)
g = getGreen(p)
b = getBlue(p)
# set red high and posterize blue and green
r = 255
g = int( posterize(g))
b = int( 255 - posterize(b))
newColor = makeColor(r,g,b)
setColor(getPixel(newPic, border + x, (border*2) + height+ y), newColor)
#position 4
for x in range(0, width):
for y in range(0, height):
p = getPixel(pic, x, y)
r = getRed(p)
g = getGreen(p)
b = getBlue(p)
# posterize red and green, increase green, then set blue to darkest
r = int( posterize(r))
g = int( posterize(g) +32)
b = 0
newColor = makeColor(r,g,b)
setColor(getPixel(newPic, (border*2) + width + x, (border*2) + height + y), newColor)
show(newPic)
writePictureTo(newPic,"d:\data\\target\\artify22.jpg")
def posterize(i):
if (i<=64):
return 32
if (i>64 and i<=128):
return 96
if (i>128 and i<=192):
return 160
if (i>192 and i<=256):
return 224
else:
return 255

There are two functions in the effect. The first function iterates through the image and reads the RBG color value of each pixel. It calls a helper function to posterize the value and return the new value.
-
Top left: Adjusts each color value with posterization, with four ranges defined by x/256.
-
Top Right: Increases the red value after posterization
-
Bottom Left: Sets the red value to maximum 255, and posterizes green and blue.
-
Bottom Right: Posterizes red and green, increases the value of green, and sets blue to zero.
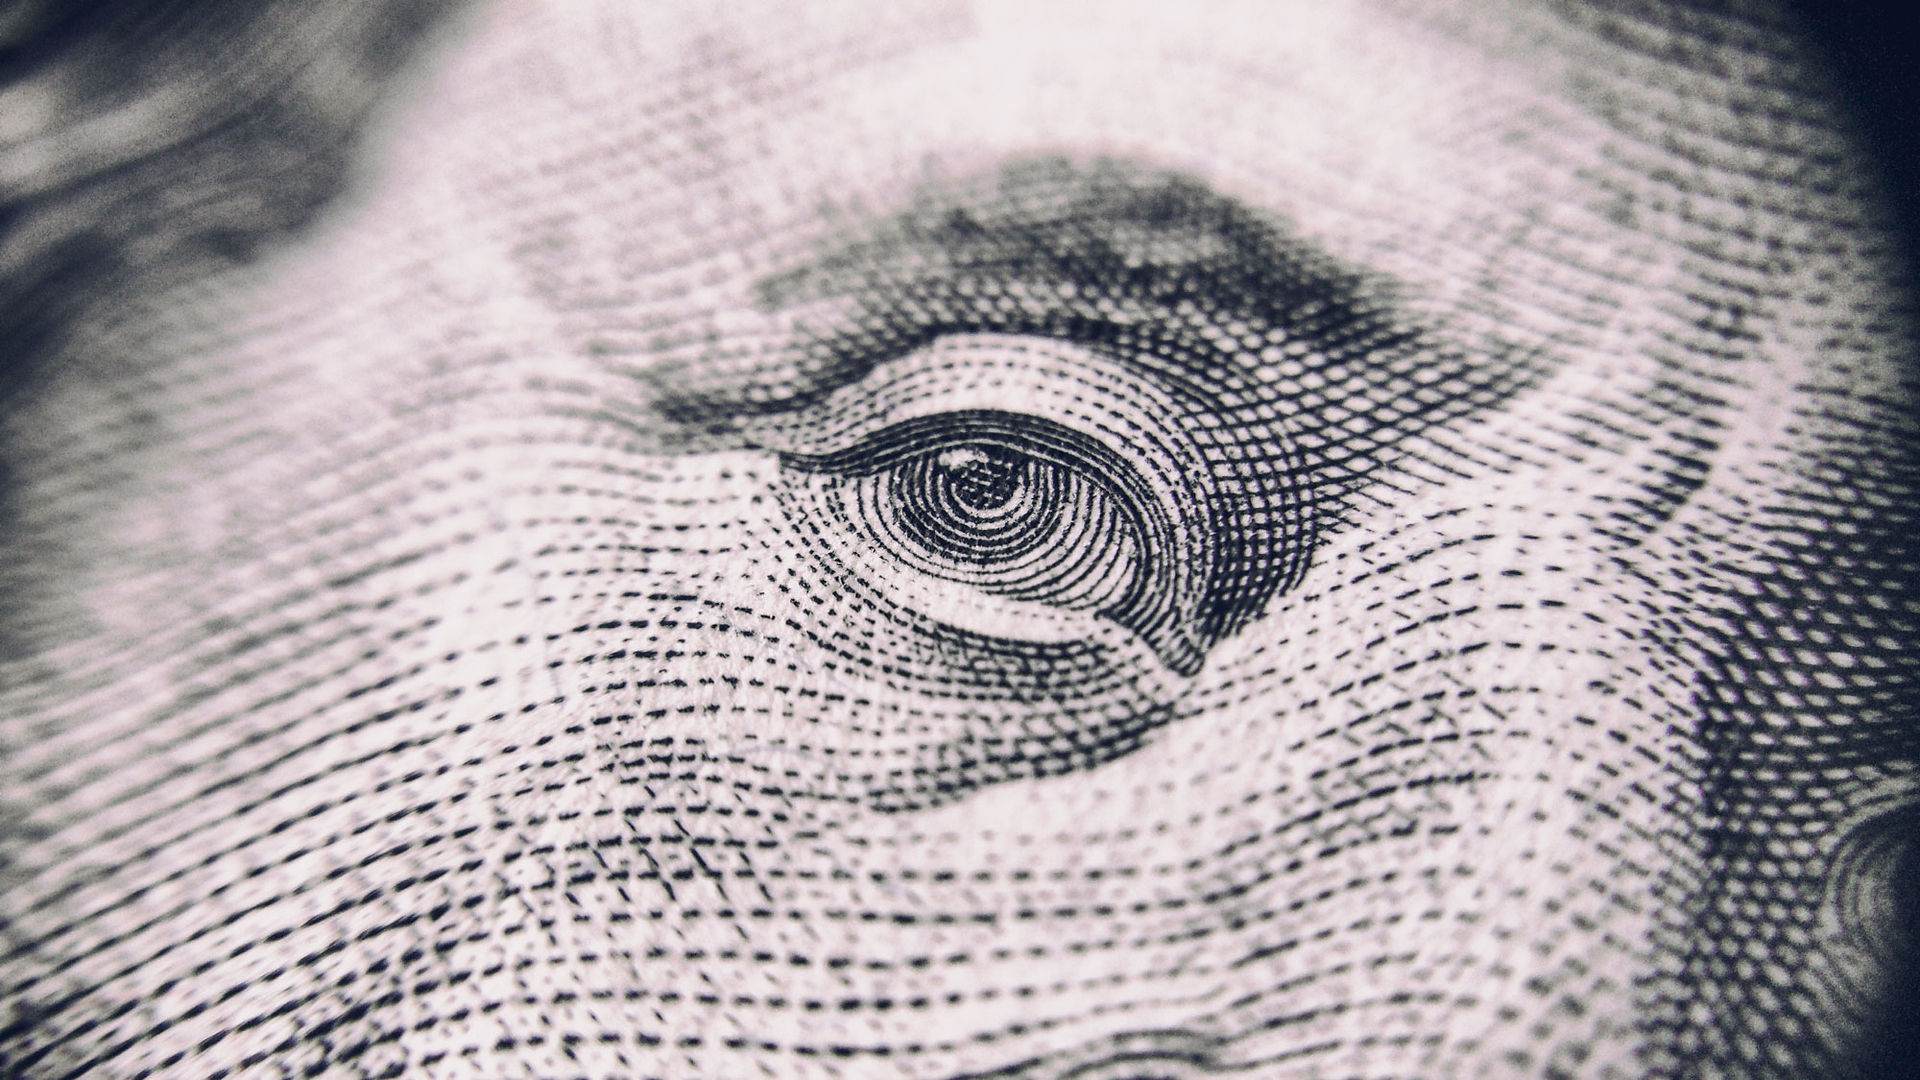
Red-Eye Reduction
This manipulation intends to reduce red-eye in photographs. This is accomplished replacing the red-eye pixels with a more appropriate color:
def redEyeCorrect(): ## cat_red_eye.jpg
pic = get_pic()
correctEye = makeColor(0, 0, 10)
correctEye2 = makeColor(10, 25, 35)
redEye = makeColor(148, 28, 0)
redEye2 = makeColor(140, 45, 15)
redEye3 = makeColor(255, 178, 150)
for x in range(120, 265):
for y in range(120, 150):
px = getPixel(pic, x, y)
color = getColor(px)
if distance(color, redEye) < 50.0:
setColor(px, correctEye)
if distance(color, redEye2) < 70.0:
setColor(px, correctEye2)
if distance(color, redEye3) < 30.0:
setColor(px, white)
show(pic)
writePictureTo(pic, newImage)
This function iterates through every other pixel in the defined area of the eyes, and if the pixel color is within distance of the red sampling of the image then the color is replaced with of the corrected value.


Green Screen
This manipulation simply reduces the size of the image. This is accomplished by copying every other pixel:
# NOTE: replace green background of subject with background image (both pictures must be equal in resolution)
def chromakey():
print 'Select background image'
background = get_pic()
print 'Select subject image'
subject = get_pic()
print 'Combining...'
greenscreen = makeColor(115, 225, 0) # this changes slightly depending on subject picture
newpic = makeEmptyPicture(getWidth(background), getHeight(background))
for x in range(0, getWidth(newpic)):
for y in range(0, getHeight(newpic)):
# for each pixel in newpic, set color to the background
setColor(getPixel(newpic, x, y), getColor(getPixel(background, x, y)))
# if same x,y location in subject image is not close to green, set color to subject
if not distance(getColor(getPixel(subject, x, y)), greenscreen) < 130.0: ## adjust this value for diff pics
setColor(getPixel(newpic, x, y), getColor(getPixel(subject, x, y)))
show(newpic)
writePictureTo(newpic,newImage")
return newpic
This function iterates through every other pixel of the image and copies the existing pixel value to a new image with half the size of the original.


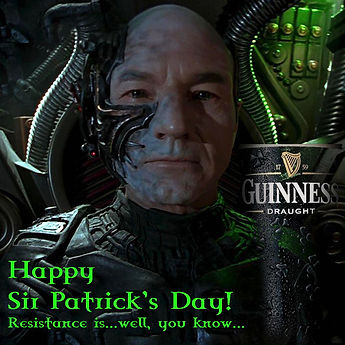
St. Patrick's Day
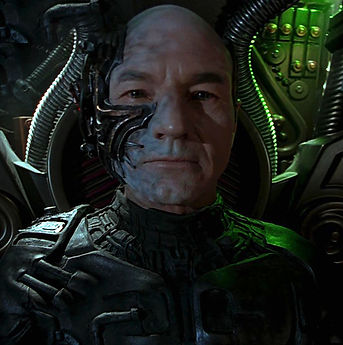
This project required the combination of several images and text into a St. Patrick's Day card. My rendition of this card is for"Sir Patrick's"day as an homage to Sir Patrick Stewart.
def makeCard():
#print 'Select background image'
background = get_pic()
print 'Select subject image one'
subject1 = get_pic()
print 'Select subject image two'
subject2 = get_pic()
print getWidth(subject2)
# print 'Select subject image three'
# subject3 = get_pic()
print 'Combining...'
#set target locations for subjects
targetX=288
targetY=481
targetX2=729
targetY2=467
#define background color to remove/ignore
greenscreen = makeColor(0, 0, 0) # this changes slightly depending on subject picture
#Add 1st
for x in range(0, getWidth(subject1)):
for y in range(0, getHeight(subject1)):
#for each pixel in subject, set color to the background
#setColor(getPixel(newpic, x, y), getColor(getPixel(background, x, y)))
#if pixel in subject image is not close to greenscreen, set color to subject
if not distance(getColor(getPixel(subject1, x, y)), greenscreen) < 40.0: ## adjust this value for diff pics
setColor(getPixel(background, targetX+x, targetY+ y), getColor(getPixel(subject1, x, y)))
#Add 2nd
for x in range(0, getWidth(subject2)):
for y in range(0, getHeight(subject2)):
# for each pixel in subject, set color to the background
#setColor(getPixel(newpic, x, y), getColor(getPixel(background, x, y)))
# if pixel in subject image is not close to greenscreen, set color to subject
if not distance(getColor(getPixel(subject2, x, y)), greenscreen) < 15.0: ## adjust this value for diff pics
setColor(getPixel(background, targetX2+x, targetY2+ y), getColor(getPixel(subject2, x, y)))
#add text messages
import java.awt.Font as Font
str1 = "Happy"
str2 = "Sir Patrick's Day!"
str3 = "Resistance is...well, you know..."
myFont = makeStyle("Celtic Garamond the 2nd",Font.BOLD, 68)
addTextWithStyle(background, 25, 900, str1, myFont, green)
myFont = makeStyle("Celtic Garamond the 2nd",Font.BOLD, 68)
addTextWithStyle(background, 25, 1000, str2, myFont, green)
myFont = makeStyle("Celtic Garamond the 2nd",Font.BOLD, 40)
addTextWithStyle(background, 25, 1060, str3, myFont, green)
writePictureTo(background,"d:\\data\\target\\target44.jpg")
This function works similar to chromakey() and adds pixels from one image to another as long as it is not within distance of the background color, in this case RGB 0,0,0. iterates through every other pixel of the image and copies the existing pixel value to a new image with half the size of the original.
Advanced Image Processing
This manipulation intends to convert a color image to a black and white line drawing. This is accomplished by comparing the difference in luminance between a pixel and the one to the right and below it. If the luminance is greater than a certain value the pixel is converted to black, otherwise the pixel is converted to white.
def AITP(diff):
pic = get_pic()
#convert to Black and White
tempPic = betterBnW(pic)
width = getWidth(tempPic)
height = getHeight(tempPic)
#examine luminance
for x in range(0, width-1):
for y in range(0, height-1):
if distance(getColor(getPixel(tempPic, x, y)), getColor(getPixel(tempPic,x+1,y))) > diff and distance(getColor(getPixel(tempPic, x, y)), getColor(getPixel(tempPic,x,y+1)))> diff:
setColor(getPixel(tempPic, x, y), black)
else:
setColor(getPixel(tempPic, x, y), white)
show(tempPic)
savePic(tempPic,"d:\data\\target\\AITP.jpg")
def betterBnW(pic):
pixels = getPixels(pic)
for p in pixels:
r = getRed(p)
g = getGreen(p)
b = getBlue(p)
# luminance formula
lum = (r * 0.299) + (g * 0.587) + (b * 0.114)
setRed(p, lum) # set all rgb values to lum
setGreen(p, lum)
setBlue(p, lum)
return(pic)
def savePic(pic,path):
writePictureTo(pic, path)

The function AITP() takes one parameter, diff. This represents the difference in luminance between pixels to check for. The function first calls get_pic() to select an image to work on. Then, the function passes that image to betterBnW() to convert the image to black and white. Then, the function iterates each pixel and checks the difference in luminance between itself (x,y), the pixel next to it (x+1,y), and the pixel below it (x,y+1). If the luminance is greater than diff, the pixel is changed to black, otherwise it is changed to white. The function then calls savPic(), a helper function to save the new image.